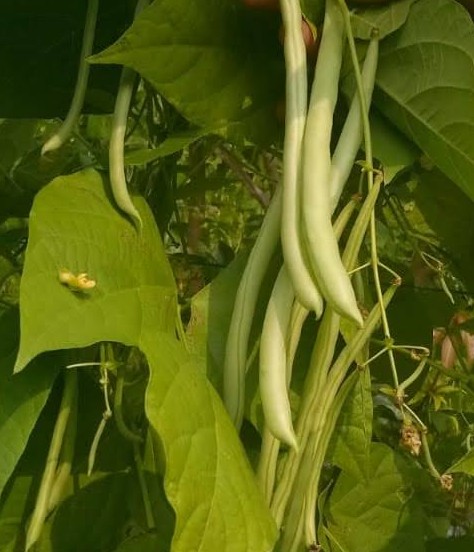
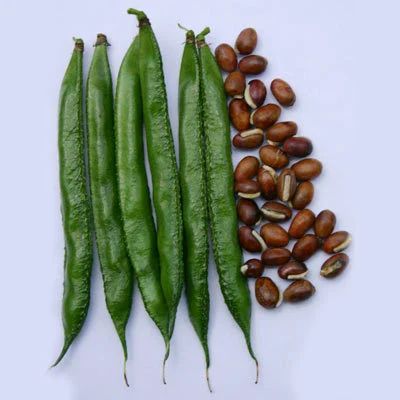
Beans are one of the most versatile and widely grown crops globally, providing essential nutrients and serving as a base for countless dishes. Their ability to grow in a range of climates and soil types makes them a popular choice among farmers. This comprehensive guide will walk you through the entire process of bean farming, from selecting the right variety to harvesting and postharvest handling.
Choosing the Right Bean Variety
Selecting the appropriate bean variety is essential for a successful harvest. Beans come in two main types: bush beans and pole beans, and each has specific needs.
Bush Bean: These compact plants grow to a short height and require minimal support. They’re perfect for smaller spaces or home gardens. Common bush beans include green beans, Lima beans, and kidney beans.
Pole Bean: These beans grow tall and need support, such as trellises or stakes. They often yield more over a longer period. Common pole beans include varieties of green beans, runner beans, and purple beans.
Bean can also be categorized by their maturity stage:
Snap Bean: These are harvested young when the pods are tender and used fresh.
Dry Bean: These bean (e.g., kidney, pinto, or chickpeas) are harvested when fully matured and dried on the plant.
Choose a variety that suits your climate, soil conditions, and market demand. Some varieties are more resistant to pests and diseases, which can reduce the need for interventions.


Ideal Growing Conditions
Beans are warm season crops, but they adapt to various climates. However, they do have specific requirements for optimal growth.
Temperature: Bean grow best in temperatures between 7085°F (2129°C). Avoid planting if frost is still a risk.
Soil: thrive in well drained loamy soil, with a pH between 6.0 and 7.0 (slightly acidic to neutral). Soil with organic matter will encourage better growth.
Water: Bean need consistent moisture, especially during flowering and pod development. Avoid waterlogging, as it can lead to root rot.
Sunlight: Full sun is essential for beans—at least 68 hours daily. Shady spots will hinder their ability to flower and produce pods.
Soil Preparation
Proper soil preparation is crucial for healthy bean growth.
Soil Testing: Conduct a soil test to check nutrient levels and pH. Bean prefer slightly acidic to neutral soil.
Amend the Soil: Incorporate well rotted compost or organic matter into the soil to enhance fertility and improve soil texture.
Tillage: Till the soil to a depth of 68 inches (1520 cm) to loosen it, ensuring better root penetration and drainage.
Sowing Beans
Bean are best for direct sown into the ground. Their fragile roots don’t transplant well, so it’s best to plant them where they’ll grow.
Timing: Plant bean when the soil temperature is at least 60°F (15°C) and after the last frost date.
Spacing:
Bush Bean: Space seeds 1.52 inches (45 cm) apart, with rows about 1824 inches (4560 cm) apart.
Pole Bean: Space seeds 24 inches (510 cm) apart, with rows about 3036 inches (7590 cm) apart. If using a trellis, plant seeds around the base.
Depth: Plant bean 12 inches (2.55 cm) deep, covering them lightly with soil.
If you start bean in a nursery, be cautious during transplanting, as their delicate roots can be damaged.
Watering and Irrigation
Bean need regular, consistent moisture, especially during their flowering and pod setting stages.
Watering: Bean generally require about 11.5 inches (2.54 cm) of water weekly. In hot, dry weather, increase watering frequency.
Irrigation: Use drip irrigation or soaker hoses to water directly at the base of the plant. Avoid overhead watering to reduce the risk of fungal diseases.
Mulching: Apply organic mulch like straw or leaves to help conserve moisture, suppress weeds, and regulate soil temperature.
Fertilization and Nutrient Management
Bean are nitrogen fixing plants, which means they naturally enrich the soil with nitrogen. However, they still need other nutrients for optimal growth.
Nitrogen: Since bean fix their nitrogen, avoid adding nitrogen heavy fertilizers. Too much nitrogen can lead to excessive leaf growth at the expense of pods.
Phosphorus and Potassium: Bean benefit from additional phosphorus and potassium, especially during the flowering and pod filling stages. Use a balanced fertilizer or organic amendments like bone meal.
Micronutrients: Bean may also need trace elements like zinc or boron, especially for strong pod development.
Pest and Disease Control
Bean are susceptible to various pests and diseases. Monitoring your crop regularly and taking timely action will help keep these problems at bay.
Pests:
- Aphids: Control with insecticidal soap or neem oil.
- Cutworms: Prevent damage by applying diatomaceous earth around seedlings.
- Bean Weevils: Use insecticides or biological control methods.
- Leafhoppers: These pests spread diseases; encourage natural predators like ladybugs or use insecticides if necessary.
Diseases:
- Rust: Fungal disease causing orange spots on leaves. Use fungicides or practice crop rotation.
- Powdery Mildew: A white fungus on leaves. Apply fungicides or organic remedies like baking soda.
- Root Rot: Caused by waterlogged conditions. Ensure proper drainage and avoid overwatering.
Preventive Measures:
Rotate crops annually to reduce the buildup of pests and diseases.
Keep the garden clean and remove infected plant material regularly.
Supporting Pole Beans
Pole bean need a support structure to grow vertically. This makes them ideal for saving space and improving airflow.
Trellises or Stakes: Install 68 foot (1.82.4 meters) tall supports at planting time. You can use bamboo stakes, wire, or string.
Cages: Circular plant cages can also provide support for pole beans.
Harvesting
Timing is crucial when it comes to harvesting beans, whether you’re growing green bean or dry bean.
Green Bean (Snap Bean): Harvest when the pods are still tender and snap easily. This usually occurs 5060 days after planting. Regular harvesting encourages more pod production.
Dry Bean: Allow bean to dry on the plant. Harvest when the pods turn brown, and the beans inside rattle. This usually happens around 90100 days after planting.
Postharvest Handling and Storage
Once you’ve harvested your bean, proper postharvest handling is crucial to maintaining quality.
Drying: If growing dry bean, ensure they are completely dried before storing. Dry beans by airdrying in a cool, dry area, or use a dehydrator.
Cleaning: Remove debris, dirt, and damaged bean. Clean beans thoroughly before storage.
Storage: Store dried bean in airtight containers in a cool, dry, dark place. This will help prevent pests and mold.
Marketing and Selling Beans
Once your beans are harvested and stored, it’s time to sell them.
Farmers’ Markets: Fresh bean can be sold at local farmers’ markets.
Supermarkets: Package your bean for retail sale, either fresh or dried.
Processing: Add value by selling processed beans, such as dried beans, bean flour, or canned beans.
Conclusion
Bean farming can be a highly rewarding and sustainable venture, whether you’re growing for personal consumption or as a commercial enterprise. By choosing the right variety, preparing the soil, managing pests, and harvesting at the right time, you can achieve a bountiful harvest. With proper postharvest care and effective marketing, beans can become a profitable crop for any farmer.