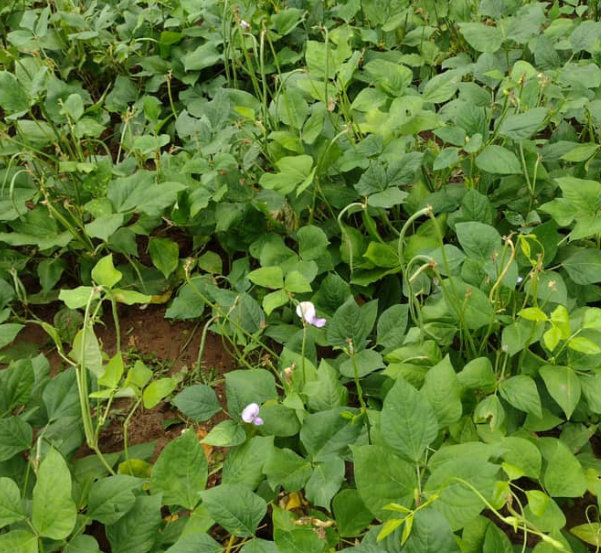
Cowpea (Vigna unguiculata), also known as black-eyed pea or southern pea, is a hardy leguminous crop renowned for its drought tolerance and versatility in hot climates. Its seeds are highly nutritious, making it a valuable crop, especially in regions with unpredictable rainfall. Whether you’re a beginner or an experienced farmer, this step-by-step guide will help you grow cowpeas successfully.
Preparing the Land for Planting
Soil Choice:
Cowpeas grow best in well-drained sandy loam or loamy soils with a pH between 6.0 and 7.5. Avoid soils prone to waterlogging, as the plant does not tolerate excessive moisture around its roots.
Field Preparation:
Begin by clearing the field of weeds, stones, and any debris. Plow the land to a depth of 15–20 cm to loosen the soil. This encourages strong root development. If necessary, use a harrow to create a fine seedbed.
Soil Fertility:
Although cowpeas are nitrogen-fixing, they benefit from additional nutrients. Apply well-rotted compost or organic manure to enrich the soil. You may also add phosphorus-rich fertilizers to promote robust growth.

Choosing the Right Seeds
Quality Seeds:
Select certified, high-quality seeds that are resistant to pests and diseases. Cowpeas come in various varieties suited to different climates, so choose one that is well-adapted to your region.
Seed Treatment:
Before planting, soak the seeds in a fungicide solution to reduce the risk of soil-borne diseases.
Planting the Seeds
Timing:
thrive in warm conditions, so plant them after the last frost, typically during the rainy season when soil temperatures reach around 25°C (77°F).
Spacing:
- Row Spacing: Space rows 45–75 cm apart to allow for proper air circulation.
- Plant Spacing: Sow seeds 2.5–5 cm deep, with 10–15 cm between plants within the row.
Planting Method:
These crops are typically direct-seeded, either by hand or with a seed drill, depending on the scale of your farm.
Watering and Irrigation
Watering Needs:
Although cowpeas are drought-resistant, they require consistent moisture during germination and flowering. Regular watering during dry spells helps prevent stress.
Irrigation Methods:
Drip or furrow irrigation systems are ideal for providing water directly to the plant roots without promoting fungal diseases. Avoid overhead irrigation, as it can increase the risk of leaf diseases.
Weed Management
Weeding:
Since cowpeas grow slowly in the early stages, weeds can compete with them for nutrients and water. Regular weeding, especially in the first few weeks, is crucial for healthy growth.
Mulching:
Apply organic mulch like straw or grass to suppress weed growth, conserve moisture, and enhance soil fertility.
Managing Pests and Diseases
Pests:
Common cowpea pests include aphids, caterpillars, and weevils. Use organic pesticides like neem oil or insecticidal soaps to control pest populations. Rotate crops to prevent pest buildup.
Diseases:
Cowpeas can suffer from fungal diseases like root rot and blight, particularly in wet conditions. Ensure good drainage and rotate crops to reduce disease pressure.
Cultural Practices:
Grow disease-resistant varieties, use certified seeds, and maintain clean fields to minimize the risk of pests and diseases.
Nutrient Management
Fertilization:
Cowpeas are nitrogen-fixing plants, but they may still benefit from additional nutrients, especially during flowering and pod formation.
- Apply a balanced fertilizer (e.g., NPK 10-20-10) at planting, and sidedress with nitrogen when the plants begin flowering.
- Organic fertilizers, such as compost or well-rotted manure, are excellent alternatives for providing key nutrients without harming the soil.
Growth Stages and Plant Care
Germination:
Cowpea seeds typically germinate within 5–7 days under optimal conditions. Keep the soil moist during this stage, but avoid waterlogging.
Vegetative Growth:
After germination, the plant enters a vegetative phase, focusing on developing leaves and stems. Adequate water and nutrients during this stage are essential for healthy growth.
Flowering and Pod Development:
Cowpeas begin flowering 30–45 days after planting. Insect pollinators, such as bees, play a key role in successful pollination, so it’s important to have a healthy pollinator population in your field.
Harvesting the Cowpeas
Maturity Indicators:
Cowpeas are ready for harvest in 70–90 days, depending on the variety and environmental conditions. Look for the following signs:
- Pods turn brown and dry.
- Seeds rattle inside the pods when shaken.
Harvesting Method:
Harvest the pods carefully by hand or with a combine harvester if you have a larger farm. Take care not to damage the pods or seeds during this process.
Drying:
After harvesting, spread the pods out to dry for 1–2 days in the sun before threshing.
Post-Harvest Handling
Storage:
Store cowpea seeds in a cool, dry location to prevent mold and pest infestation. Use airtight containers or sacks to protect the seeds from moisture and insects. Proper storage ensures that the seeds remain viable for several months.
Processing:
Cowpeas can be processed into a variety of products such as dried beans, flour, or snacks. They can also be sold as fresh or dried beans in local markets.
Selling and Marketing Cowpeas
Market Research:
Before planting, research local demand to understand which cowpea varieties are most popular. This will help you target your crops to the right market.
Packaging and Selling:
Clean and properly package the cowpeas to maintain their quality, whether you’re selling in bulk or to local consumers. If you’re selling fresh cowpeas, ensure they are kept cool to prevent spoilage.
Conclusion
Cowpea farming offers a promising opportunity for both small-scale and large-scale farmers. Its ability to grow in low-resource settings, combined with its high nutritional value, makes it an essential crop for many regions around the world. By following these steps, you’ll be able to ensure a successful and profitable cowpea harvest while promoting sustainable farming practices.